The best time to polish your concrete floor is before paint, and ideally before plaster goes in. Polishing the slab while the building is weathertight but still raw inside gives the polishing team a clear, open shell to work on - no painted walls to protect, no finished surfaces to mask off, and no risk of damaging fresh plaster. Getting the timing right is one of the simplest ways to reduce cost and get a better result from your polished concrete floor.

If you are building a new home and planning polished concrete floors, this guide covers exactly where floor polishing fits in the construction sequence, what to tell your builder, and how to protect the finished floor during the rest of the build.
The Construction Timeline - Where Polishing Fits
Here is a typical New Zealand new build construction sequence, with the ideal polishing window highlighted.
| Stage | What happens | Floor status |
|---|---|---|
| 1. Slab pour | Concrete is poured and finished | Fresh - must cure for minimum 28 days |
| 2. Framing and roofing | Walls framed, roof goes on | Slab exposed, curing continues |
| 3. Windows and exterior cladding | Building becomes weathertight | Slab protected from weather |
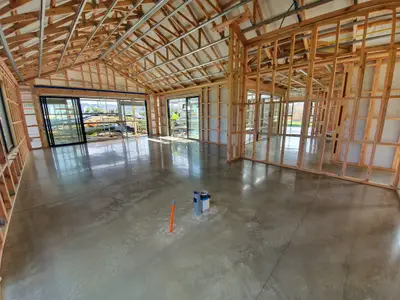
| 4. Insulation and gib lining | Interior walls lined but not yet stopped or painted | Slab in a clean, enclosed shell |
| 5. POLISH THE FLOOR (ideal window) | Diamond Shine Concrete grinds and polishes the slab | Raw shell - best access, best price, no finishes to protect |
| 6. Plaster (gib stopping) and paint | Walls finished and painted | Floor protected during finishing trades |
| 7. Skirtings, kitchen, bathroom, joinery installation | Cabinetry and fittings go in against finished floor level | Floor must be protected during install |
| 8. Final fix | Hardware, carpet to bedrooms, finishing touches | Floor revealed and cleaned |
The key window is Stage 5 - once the house is weathertight and lined, but before plaster (gib stopping) and paint go on the walls. At this point the slab is fully cured, the building is enclosed, there are no painted surfaces to protect, and the polishing team has a completely open floor to work on. Polishing before paint is the rule. Polishing before plaster is even better when the build sequence allows, because there is no risk of damaging fresh plaster with grinding dust or splash-back.
Why skirtings must wait: This is a detail that gets missed. If you are doing a heavier grind (taking roughly 5mm off the surface), any skirtings installed before polishing will end up looking like they are floating above the floor. The polisher removes material from the slab, lowering the floor level. Skirtings and cabinetry should always go in after polishing so they sit flush against the finished surface.
Why Timing Matters for Your Budget
The difference between polishing an empty shell and polishing a finished home is significant - both in cost and result.
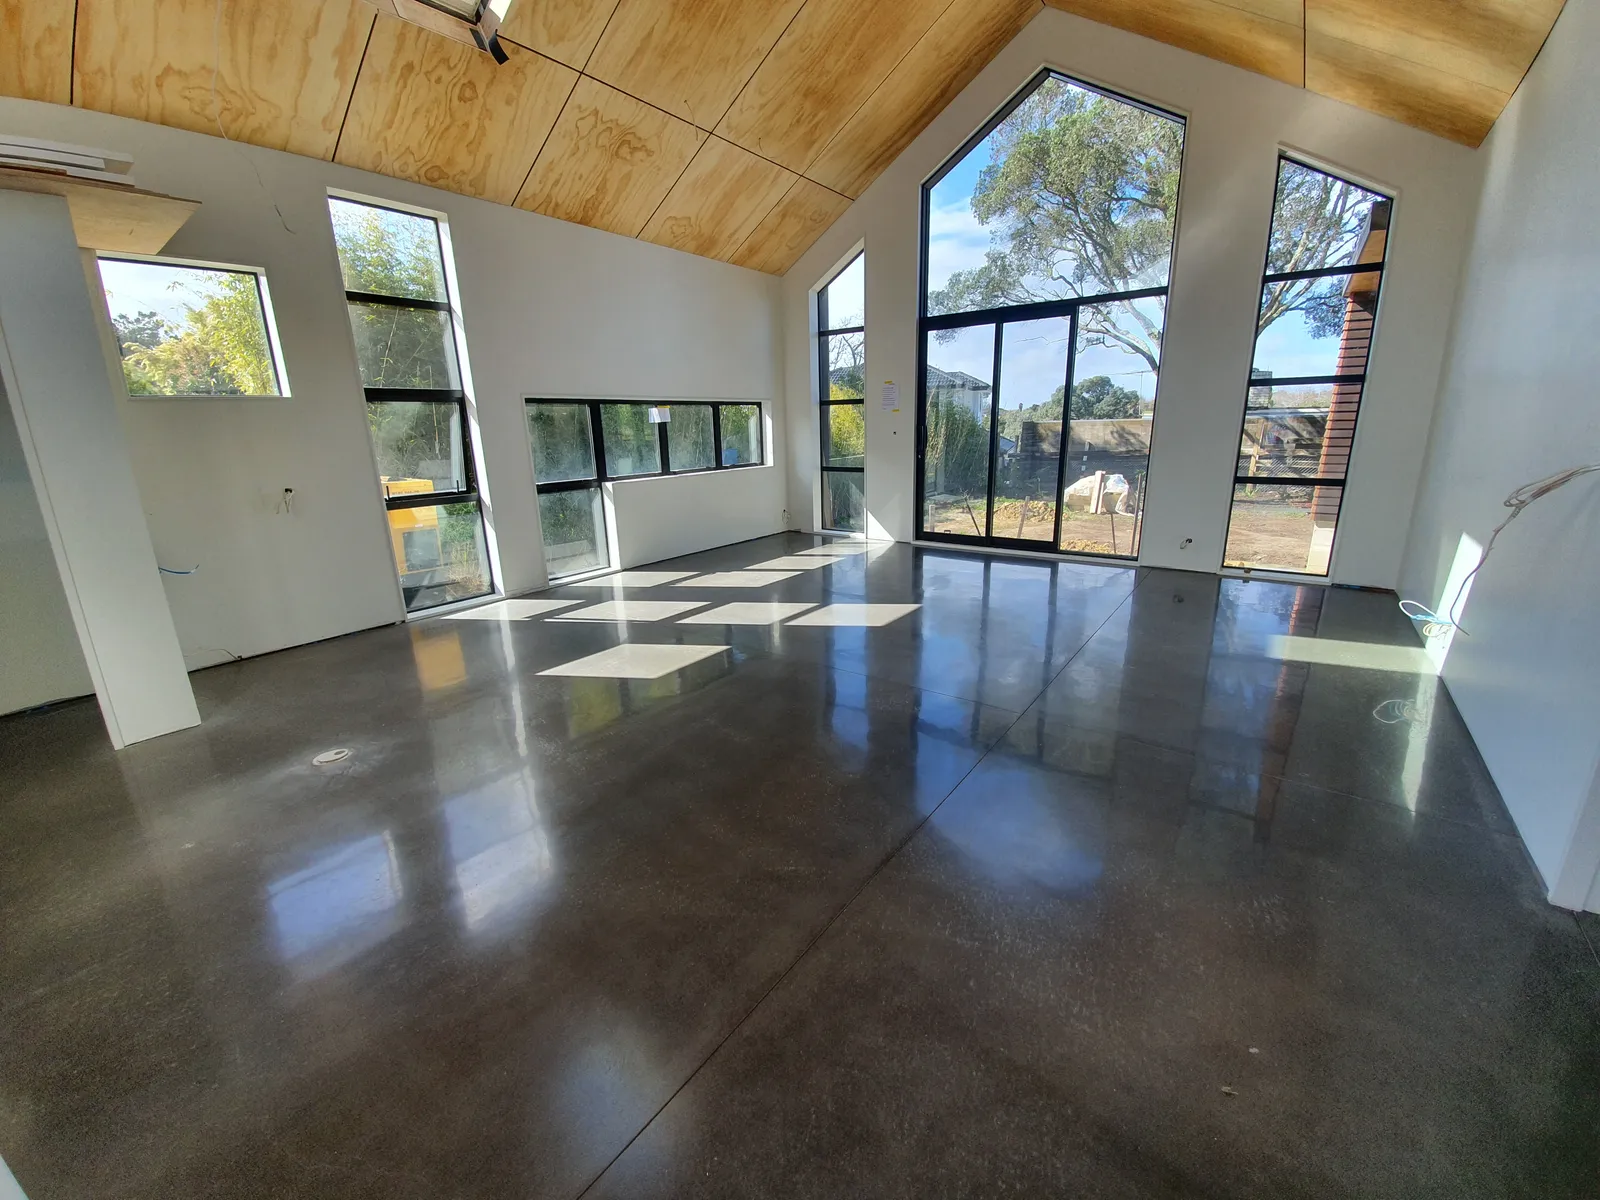
Raw Shell, Before Paint (Stage 5) - The Sweet Spot
When the floor is open and clear, before paint is on the walls, the grinding machines can run continuously without stopping. There are no cabinets to work around, no painted surfaces to protect, and no tight spaces to navigate. Doing it before plaster as well is even better - no fresh stopping to damage. This is the most efficient scenario for the polishing team and the cheapest stage to book the job.
For most residential jobs at this stage, you are looking at roughly $100 per m2 + GST for a standard 50-70m2 open-plan area.
Finished Home - Expect to Pay More
Polishing a floor after the kitchen, bathroom, and joinery are installed is a different job entirely. The team has to:
- Work around fixed cabinetry with hand tools and edge grinders
- Protect painted walls, plaster, and skirting boards from dust and contact
- Navigate tight spaces between counters, islands, and doorways
- Mask off surfaces and manage dust extraction more carefully
Because of the extra time and care required, finished home polishing typically costs $120-$130 per m2 + GST. On a 60m2 floor, that is an extra $1,200 to $1,800 compared to polishing at the empty shell stage.
Layout Complexity and Grind Depth Also Affect Timing
The ideal timing also depends on your specific home. Two factors that often get overlooked:
Grind depth. A light surface polish is straightforward at almost any stage. But if you want a heavier grind with significant aggregate exposure, timing becomes more critical. A heavy grind removes more material, creates more dust, and takes longer - making it much harder to do safely once finishes are in place.
Layout complexity. Open-plan homes are relatively straightforward. But complex layouts with lots of separate rooms, tight hallways, and multiple doorways are significantly harder to polish once paint is on the walls. Every wall, doorframe, and corner becomes a surface the team has to protect. All the risk of damage falls on the polishing crew, which adds time and cost. If your home has a complex layout, getting the timing right is even more important.
For a detailed breakdown of all pricing tiers, see our full pricing guide.
The 28-Day Curing Rule
Concrete needs a minimum of 28 days to cure before polishing can begin. This is non-negotiable. Grinding into concrete that has not fully cured will produce a poor result - the surface will be too soft, the finish will not hold, and the floor may need to be redone.
In practice, most new builds give the slab well over 28 days before the polishing stage is reached. By the time framing, roofing, cladding, and gib lining are complete, the slab has usually had two to four months of curing time. This is more than enough.
If your build is moving quickly and the polishing stage arrives close to the 28-day mark, let DSC know. We can test the slab hardness and advise whether it is ready.
What to Tell Your Builder
Most builders in Auckland have worked with concrete polishers before. It is a common specification in New Zealand new builds, so this will not be an unusual request. Here is what your builder needs to know.
Before the Pour
- Discuss the concrete mix. The aggregate type, slump, and finishing technique all affect how the floor will look once polished. If you want a particular style - such as a salt and pepper finish - the mix design matters.
- Specify a power float finish. The slab should be power floated (machine trowelled) for a smooth, even surface. Hand-finished slabs can be polished, but they are less consistent.
- Control joints should be planned. Where the control joints go will affect the final appearance. Discuss joint placement with both your builder and your polisher.
During the Build
- Keep the slab clean. Avoid dropping plaster, paint, adhesives, or construction waste directly on the slab surface. Light foot traffic is fine, but heavy chemical spills or adhesive can stain or damage the surface layer.
- No curing compounds. Some builders apply curing compounds to the slab surface. These need to be ground off before polishing, which adds time and cost. If polishing is planned, ask the builder to cure with water or wet hessian instead.
Scheduling the Polish
- Book early. Let DSC know the approximate polishing date as early as possible. During busy periods (spring and summer), lead times can extend.
- Allow 2-5 days on site. Most residential floor polishing takes 2-3 days, but larger areas or higher gloss levels can take up to 5 days. Your builder will need to schedule other trades around this window.
How to Protect the Floor After Polishing
Once the floor is polished, the remaining trades (kitchen install, joinery, plumbing, electrical final fix) still need to work in the space. Protecting the freshly polished floor during this phase is critical.
What to Use
- Cardboard or building paper - Lay flat across the floor surface. Tape the edges so sheets do not shift underfoot.
- Masonite boards - Place under heavy items or where cabinetry is being installed. Distributes weight and prevents point-loading on the floor.
- Felt pads - Put under anything that will be dragged or slid across the surface.
What NOT to Use
- Plastic sheeting - Do not cover polished concrete with plastic. Plastic traps moisture underneath, which can cause discolouration, white marks, or haze on the surface. This is one of the most common mistakes during new builds.
- Drop cloths with rubber backing - Same issue as plastic. The rubber traps moisture against the floor.
General Rules
- No dragging heavy items across the surface
- Clean up spills immediately - especially paint, adhesive, or grout
- Keep the protective covering in place until all trades are finished
- Once all work is complete, remove the covering and give the floor a final clean with a damp mop
Can You Polish After the Kitchen Is Already In?
Yes. It is absolutely possible to polish a floor after the kitchen and joinery are installed. DSC does this regularly for renovation projects and homes where the build sequence did not allow for earlier polishing.
The result can be just as good. The main differences are:
- Cost increases due to the extra time and care required (roughly $120-$130 per m2 vs $100 per m2 for an empty shell)
- Edge work around cabinetry is done with smaller hand tools, which takes longer
- Protection of surrounding surfaces adds setup time
If you are already past the ideal window, do not worry. Just factor in the slightly higher cost and book the job in.
How Long Does Polishing Take?

For a typical new build residential floor (50-80m2), plan for 2-3 days on site. This covers:
- Day 1: Initial grinding passes (coarse diamond tooling to remove the surface layer)
- Day 2: Progressive grinding with finer diamonds, densifier application
- Day 3: Final polishing passes and cleanup (if high gloss is specified)
Larger floors or full high-gloss finishes may take 4-5 days. Matte and satin finishes require fewer passes and are typically faster.
The team arrives with industrial grinding equipment, diamond tooling, and a full dust extraction system. The process is dusty at the coarse stages, but the extraction equipment captures the majority of it.

Planning the polish into your build? See our concrete polishing and grinding service in Auckland or get in touch for a quote.
Frequently Asked Questions
Can I polish after the kitchen is in?
Yes. DSC polishes floors in finished homes regularly. The result is the same quality, but the job takes longer due to working around cabinetry and protecting surfaces. Expect to pay roughly $120-$130 per m2 + GST compared to about $100 per m2 in an empty shell.
How much does it cost to polish a new build floor?
For a standard new build with an open slab (50-70m2), most jobs sit around $100 per m2 + GST. Larger open areas (200m2+) can drop to around $60 per m2. There is a minimum charge of $2,250 + GST for floors under 20m2. Full pricing details are in our Auckland pricing guide.
How long does polishing take?
Most residential new build floors take 2-3 days on site. Larger areas or high-gloss finishes may take 4-5 days. Your builder will need to schedule other trades around this window.
What does the builder need to know?
The main points are: allow minimum 28 days curing before polishing, use a power float finish on the slab, avoid curing compounds (use water or wet hessian instead), keep the slab clean during the build, and schedule the polish before paint - ideally before plaster (gib stopping) - and well before kitchen, skirtings and joinery installation.
Should I get the polisher involved before the slab is poured?
It is a good idea. DSC can advise on the concrete mix, control joint placement, and finishing technique to get the best result from your specific floor. A quick conversation before the pour can save issues later.