
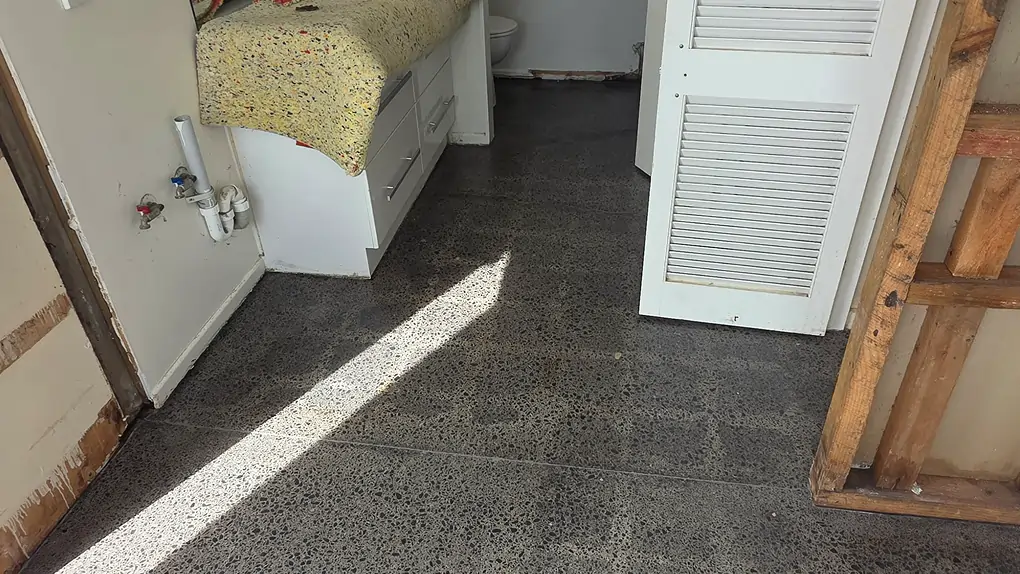
Tile ghosting is when faint grid lines from old tiles show through a polished concrete floor. It happens because tile adhesive and grout change the concrete's density and porosity over time. The honest truth - tile ghosting does not fully go away, even with heavy grinding. But with the right approach, we reduce it significantly and guide you through what to expect before any work starts.

If you have pulled up old tiles and can still see a faint grid pattern in the concrete, you are looking at tile ghosting. It is one of the most common concerns we hear from Auckland homeowners planning a concrete polish after a renovation.
What Causes Tile Ghosting in Concrete?
Concrete looks solid, but it behaves more like a sponge over time. When tiles are laid on a concrete slab, several things happen to the surface underneath.
Adhesive penetration. Tile adhesive soaks into the pores of the concrete wherever it is applied. Over 10, 20, or 30 years, that adhesive bonds deeply with the slab. Even after scraping the surface clean, adhesive residue remains embedded within the concrete itself.
Grout line compression. The grout joints between tiles create a grid pattern where the concrete was either left exposed or covered with a thinner layer of adhesive. These strips absorb moisture and stains differently from the adhesive-covered areas, creating visible lines in the slab.
Uneven curing and moisture. Moisture gets trapped differently under tiles compared to grout lines. Over decades, the slab cures unevenly in different areas, and surface hardness varies depending on what has been covering it. All of these factors create subtle differences within the concrete that only become visible once grinding begins.
Chemical changes. The adhesive alters the concrete's density and porosity in a grid pattern. When you grind the surface, the treated areas and untreated areas respond differently to the polishing process - they reflect light at slightly different levels, which is what makes the ghost lines visible.
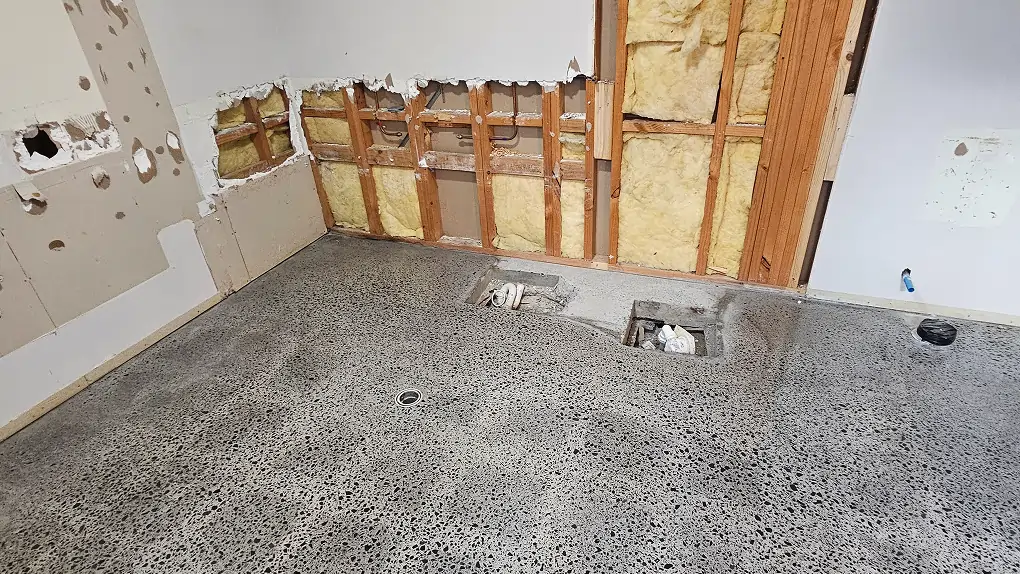
Before grinding, you will not see any of this. Once we open up the surface, the concrete starts revealing its history.
Tile Ghosting vs Other Floor Marks
How We Handle Tile Ghosting
Our approach to tile ghosting is honest and methodical. We cannot make it disappear entirely, but we reduce it as much as the slab allows and make sure you know exactly what to expect before we start.
Here is how the process works on a typical tile ghosting job.
Step 1 - Assess your slab before starting. We flag the risk of ghosting upfront if tiles have been present. On arrival, we carry out a sample grind so you can see how the floor responds before we commit to the full area.
Step 2 - Remove all remaining adhesive. Before polishing starts, we use coarse diamond tooling to strip away any adhesive left on the surface after tile removal. This is not a gentle pass - tile adhesive needs a heavy cut to come off cleanly. Light grinding smears and burns adhesive rather than removing it, which is why we always start with aggressive tooling.
Step 3 - Talk you through your options. Once the surface adhesive is gone and the sample grind is done, we can see how deep the ghost pattern goes and how the slab is responding. We talk you through your finish options and what each one means for ghosting visibility before continuing.
Step 4 - Medium to heavy grind across the entire floor. We grind the entire floor to the same depth, using a medium to heavy grind - not a light salt-and-pepper finish. A deeper cut exposes more aggregate (stone) in the concrete, which helps blend the ghosting into a more natural, varied look. On older slabs, a heavier grind is needed regardless because the concrete is rarely flat after decades of settlement. DSC uses the same process across the entire floor for a consistent result.
Step 5 - Fill and repair. Any cracks, chips, or holes (including tack strip damage if the home previously had carpet in other areas) are filled with colour-matched resin.
Step 6 - Progressive polishing and densifying. We work through increasingly fine diamond grits, applying a densifier to harden and seal the surface. The final passes bring out the sheen and lock in the finish.
What Different Finishes Mean for Tile Ghosting
Different polishing options affect how noticeable tile ghosting is. None of them eliminate it completely, but the right choice can make a significant difference to the final look.
For most tile removal jobs, we recommend a medium to heavy grind with a satin (semi-gloss) finish. It is the sweet spot between looks, durability, and stain resistance, and it gives the floor 20+ years of life with good maintenance.
For a full breakdown of finish levels and what they look like, read our guide to polished concrete after carpet removal, which covers grind depths in detail.
Why Grinding Does Not Fully Remove Tile Ghosting
This is the part most people want to understand. Tile ghosting is not just leftover adhesive sitting on top of the slab. The issue sits within the concrete itself.
Over years or decades, tile adhesive penetrates deep into the concrete. Moisture differences develop between tiled and grouted areas. The slab cures unevenly depending on what has been covering it. By the time we start grinding, these changes are part of the concrete itself.
Grinding deeper simply reveals more of the slab - it does not erase its history. A heavier grind can soften the look and blend the floor more evenly by exposing more stone, but the underlying differences in the concrete remain.
This is also why you will not know exactly how your floor will look until we start grinding. Every slab has its own history, and the concrete reveals that history as we work.
Managing Expectations
This is the most important section of this article. Tile ghosting is not a fault in the polishing process - it is a characteristic of the existing slab.
At Diamond Shine Concrete, we handle this by being upfront from the start. We flag the risk before any work begins if tiles have been present. We carry out a sample grind on arrival. We talk you through your options before continuing. No surprises. No unrealistic promises.
Whether tile ghosting is a problem depends on what you are after. Some people want a completely uniform, flawless finish. Others are happy with a natural, slightly varied look - a floor with character and history. Polished concrete is not a manufactured product. It reflects what is already there.
Our straight-up advice. If you are after a perfect, uniform floor with zero variation, polished concrete over an old tiled slab may not be the right option for you. But if you are happy with a natural, unique finish - slight variation in tone and texture, a floor that reflects the slab's history - then polished concrete is still an excellent choice. We have polished hundreds of these floors across Auckland and know exactly what to expect, and how to guide you through it.
What Does Tile Ghosting Removal Cost?
Tile ghosting jobs fall under renovation and restoration pricing. Because the work requires a deeper grind and more preparation than a standard polish, costs sit slightly higher than a straightforward new slab job.
For a complete breakdown of polished concrete pricing in Auckland, including larger homes and commercial spaces, read our full cost guide.
Frequently Asked Questions
Will tile ghosting show through polished concrete?
Yes - to some degree. Tile ghosting will remain visible even after grinding and polishing. A light grind (salt and pepper) leaves it most visible because the adhesive has penetrated deeper than the grinding reaches. A medium to heavy grind reduces the appearance by exposing more stone and blending variations, but it does not eliminate ghosting entirely. We carry out a sample grind on arrival so you can see exactly what your floor will look like before we continue.
How much does it cost to handle tile ghosting in concrete?
Tile ghosting work is part of our renovation pricing. For a typical Auckland home with 50 to 70m2 of floor area, expect $90 to $120 per m2 + GST. This covers adhesive removal, grinding, repairs, and polishing to a satin finish. Small areas under 20m2 have a minimum charge of $2,250 + GST. For full pricing details, see our polished concrete cost guide.
Will tile ghosting fade over time?
No. Tile ghosting is part of the concrete itself - it is not something sitting on the surface that wears away. The adhesive penetration, moisture differences, and curing variations are permanent characteristics of the slab.
Can tile ghosting be patched or filled?
Not effectively. Attempting to patch tile ghosting usually makes it more noticeable, not less. The issue is within the concrete's density and porosity, not a surface defect that can be filled.
Can a sealer hide tile ghosting?
Topical sealers may slightly mask ghosting, but they will not remove it - and they come with downsides. Topical coatings are prone to scratching and peeling over time, which creates more maintenance issues than the ghosting itself. A mechanically polished finish with densifier is the better long-term approach.
Is tile ghosting avoidable?
Only if the slab has never had tiles or other coverings that affect the surface. If tiles have been down for any length of time, some degree of ghosting is almost certain once grinding begins. This is why we always assess the slab and carry out a sample grind before committing to the full job.
Can I polish over old tile adhesive without removing it first?
No. Tile adhesive must be removed before polishing. Adhesive residue prevents the diamonds from cutting evenly into the concrete, creating an inconsistent surface. It also interferes with densifier absorption, which affects the final finish quality. We remove all adhesive as the first step in our preparation process.
Should I remove the tiles myself before you come?
You can remove the tiles yourself to save time on the job. Just be aware that removing the adhesive underneath is the harder part, and that is included in our service. Whether you leave the tiles in place or strip them yourself, the pricing is the same because the grinding and preparation work stays identical.